If you are starting with Power Apps, this tutorial will be very helpful. In it, I will explain how to build an app from scratch using Power Apps.
Here, I will create a canvas app which will have the below controls:
- Textinput control
- Label
- Button
When the user clicks on the button, it will display a greetings message using the label control.
Let’s get started.
Build a Power Apps App from Scratch
Follow the below steps to build an app using Power Apps from scratch.
- Navigate to https://make.powerapps.com, and then, from the home page, click on + Create. Then, Choose the Blank app, like in the screenshot below.

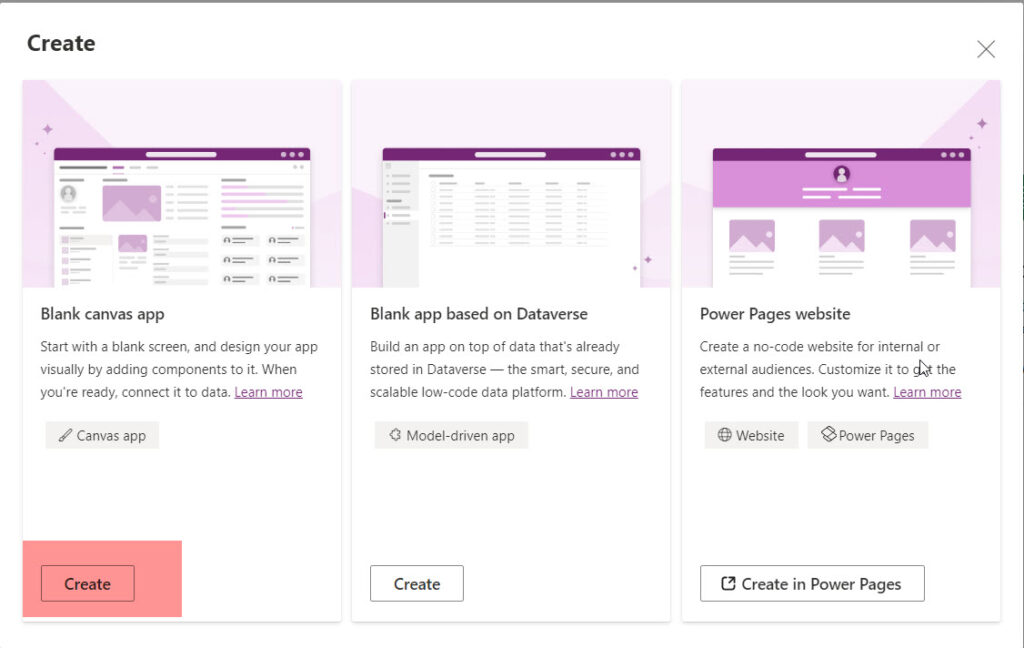
- It will open the Create dialog box. Here, choose the Blank Canvas app and click on the Create button, as in the screenshot below.
- Now, here, provide the “App name” and then choose the “Format” as the Tablet layout. The screenshot is below; you can have a look at it. Then, click on the “Create” button.

- Once you click on the Create button, a blank Canvas app will be created. It will have only one blank screen, as in the screenshot below.

Check out Create an App in Power Apps using Copilot
Power Apps Set Label Text on Button Click
Now, I will show you how to display a textbox value in a label control on a button click in Power Apps or a greeting message in Power Apps.
- Add the controls below from the blank screen. To do this, click on the “+ Insert” option and then choose all the controls.
- Button
- Text input
- Text Label

- For the best practices, you can rename all the controls. Right-click on the control from the Tree view and then click on Rename. Here, I rename the controls lblResult, btnSubmit, txtName, etc.

- Here are a few other things you can change:
- Change the button Text property to Submit.
- Remove the default value of the text input control
- Remove the default value of the Text from the Label control (lblResult)
- Set the default value of the Text property to “Enter Your Name: ” for lblName control
- Now, Select the button, choose the OnSelect property, and then write the below formula:
Set(varMesage,"Hello " &txtName.Text)

or

UpdateContext({varMesage: "Hello " & txtName.Text & "!"})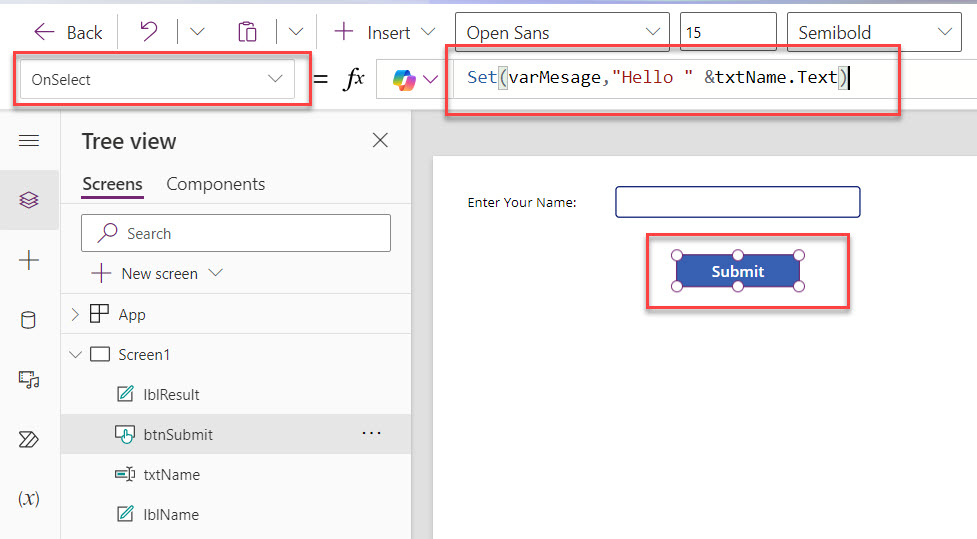
- Next, select the lblResult label, choose the Text property, and provide the “varMessage”.
varMessage
- Now, when you play the app, you can see the Textbox and a button like below. Here, when you enter your name and click on the Submit button, it shows Hello and your name like below.

- This is how to display text input value in a label control on a button click using Power Apps.
Once everything is done, then you can Save and publish the app and use it.
In this tutorial, I have explained how to create an app from scratch using Power Apps and how to display the text input control value in a label control on a button click using Power Apps.
You may also like:

I’m Bijay Kumar, a Microsoft Business Application MVP specializing in Power Automate. I have been honored 11 times. With over 18 years in the IT industry, I have practical experience in Power Apps, Power Automate, Power BI, Power Pages, and SharePoint Online. I also co-authored the book Microsoft Power Platform—A Deep Dive. Currently, I develop various apps using Power Apps and automate business processes for many clients in the USA using Power Automate. Read more.