If you have ever built a leave management app, a project tracker, or even a simple employee onboarding form in Power Apps, you have most likely run into this exact problem — you have two dates sitting in your canvas app, and you need to calculate how many days, months, or years are between them.
In this tutorial, I am going to walk you through everything — from the very basics of the DateDiff function in Power Apps to advanced scenarios like combining years, months, and days into a single readable string, calculating time differences in hours and minutes, and even handling timezone offsets.
Let’s get into it.
What Is the DateDiff Function in Power Apps?
The DateDiff function in Power Apps is a built-in Power Fx function that returns the difference between two date or date-time values. It gives you a whole number result in whatever unit you specify — days, months, years, hours, minutes, or even milliseconds.
This function is available across Canvas Apps, Model-Driven Apps, Power Pages, Dataverse Formula Columns, Copilot Studio, and Desktop Flows. So once you learn this in a canvas app, you can apply the same logic pretty much everywhere in the Power Platform.
Basic Syntax of DateDiff() Function
Here is the basic syntax:
DateDiff( StartDateTime, EndDateTime [, Units] )
Parameters:
- StartDateTime — The starting date or date-time value.
- EndDateTime — The ending date or date-time value.
- Units (optional) — The unit in which you want the difference. If you skip this, it defaults to
TimeUnit.Days.
Available Units:
| Unit | Description |
|---|---|
TimeUnit.Milliseconds | Difference in milliseconds |
TimeUnit.Seconds | Difference in seconds |
TimeUnit.Minutes | Difference in minutes |
TimeUnit.Hours | Difference in hours |
TimeUnit.Days | Difference in days (default) |
TimeUnit.Months | Difference in months |
TimeUnit.Quarters | Difference in quarters |
TimeUnit.Years | Difference in years |
One important thing to keep in mind — DateDiff always returns a whole number. It does not return decimals. So if the difference is 1.5 months, you will get 1, not 1.5. I will show you how to handle precision later in this tutorial.
Setup: Add Date Picker Controls to Canvas App
Before I start writing formulas, let me show you the setup I will use throughout this tutorial.
- Open your Power Apps canvas app (or create a new blank canvas app).
- From the command bar, click + Insert → search for Date Picker and add two of them to the screen.
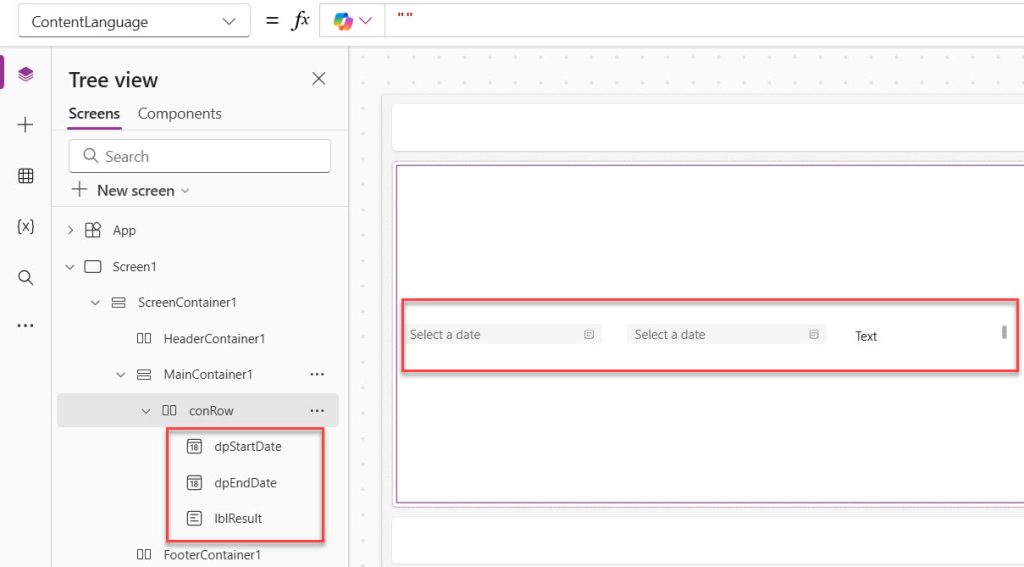
- Rename the first Date Picker to
dpStartDateand the second one todpEndDate. - Add a Text control and rename it to
lblResult. This is where I will display the calculated difference.
That’s it. Your screen should look simple — two date pickers and a label. Here is a screenshot of how my Power Apps canvas looks. Note: I have designed a responsive canvas app here.
Now let’s start calculating.
Calculate Difference in Days
This is the most common use case in Power Apps. Let’s say I want to know how many days are between a start date and an end date selected by the user.
On the Text property of lblResult, write this formula:
DateDiff(dpStartDate.SelectedDate, dpEndDate.SelectedDate, TimeUnit.Days)
Example output: If the start date is March 17, 2026, and the end date is March 24, 2025, the result will be 7.
You can also wrap it with a friendly label:
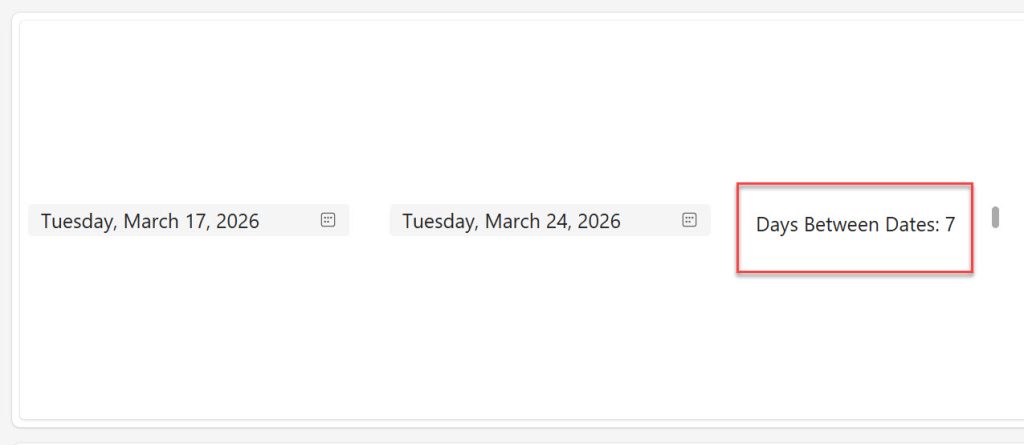
"Days Between Dates: " & DateDiff(dpStartDate.SelectedDate, dpEndDate.SelectedDate, TimeUnit.Days)
This is simple, clean, and works perfectly for leave tracking, project duration calculators, or any scenario where you need a day count.
Here is the exact output you can see in the screenshot below:
Check out Data Table Control in Power Apps Canvas App
Calculate Difference in Months
If you want the difference in complete months, then you can use the formula below:
DateDiff(dpStartDate.SelectedDate, dpEndDate.SelectedDate, TimeUnit.Months)
Important to understand: This returns the number of full calendar months that have been crossed, not the total number of 30-day periods. For example, from January 31 to February 1 is counted as 1 month by Power Apps, even though that is only 2 days apart. Keep this in mind when building payroll or billing scenarios.
Calculate Difference in Years
To get the number of complete years between two dates in Power Apps:
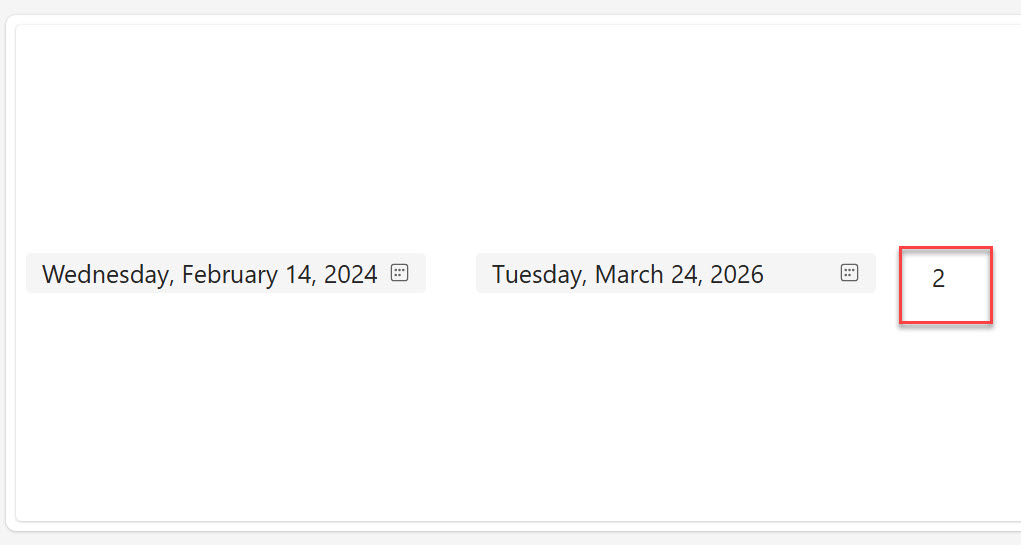
DateDiff(dpStartDate.SelectedDate, dpEndDate.SelectedDate, TimeUnit.Years)
This is especially useful when calculating employee tenure, contract durations, or membership length.
You can see the exact output in the screenshot below:
Calculate Difference in Weeks
There is no TimeUnit.Weeks in Power Apps (yes, that surprised me the first time too). The way to handle this is to divide the days result by 7:
Int(DateDiff(dpStartDate.SelectedDate, dpEndDate.SelectedDate, TimeUnit.Days) / 7)
I use Int() here to strip out the decimal and give a clean whole number of complete weeks.
Read Set Control Value in Button Click on Power Apps
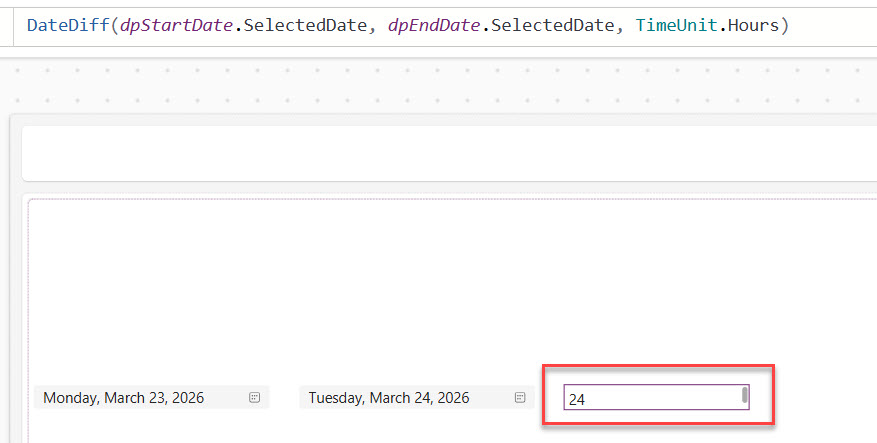
Calculate Difference in Hours
When you are working with date-time values (not just dates), you can calculate the difference in hours:
DateDiff(dpStartDate.SelectedDate, dpEndDate.SelectedDate, TimeUnit.Hours)
You can see the exact output in the screenshot below:
Or using the Now() function to compare against the current moment:
DateDiff(DateTimeValue("2026-03-01 09:00:00"), Now(), TimeUnit.Hours)
A practical use case: calculating how long an incident has been open in a helpdesk app.
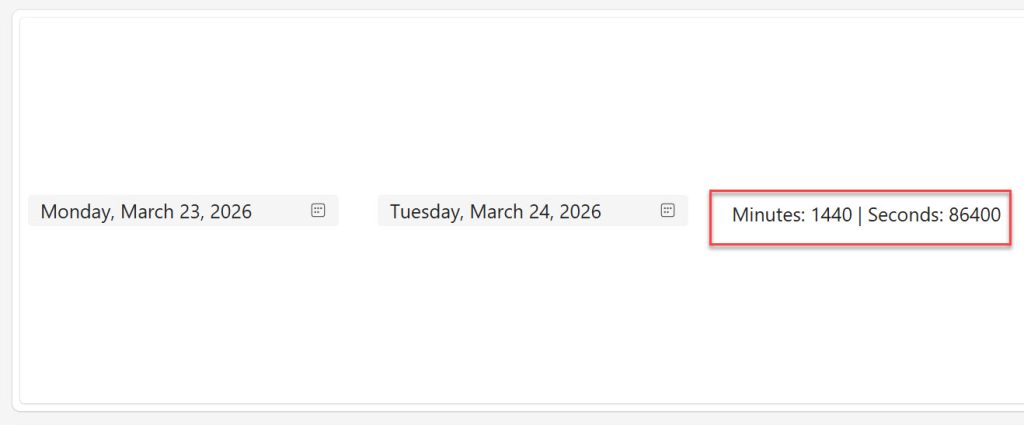
Calculate Difference in Minutes and Seconds
Here’s how to get the difference in minutes:
"Minutes: " & DateDiff(dpStartDate.SelectedDate, dpEndDate.SelectedDate, TimeUnit.Minutes)
And for seconds:
"Seconds: " & DateDiff(dpStartDate.SelectedDate, dpEndDate.SelectedDate, TimeUnit.Seconds)
You can also show both date and time like below:
"Minutes: " & DateDiff(dpStartDate.SelectedDate, dpEndDate.SelectedDate, TimeUnit.Minutes) &
" | Seconds: " & DateDiff(dpStartDate.SelectedDate, dpEndDate.SelectedDate, TimeUnit.Seconds)
You can see the exact output in the screenshot below:
You can also use the Time() function to construct time values if you have hours and minutes stored separately. For example, if a user inputs a start time using dropdown controls:
DateDiff(
    Time(Value(ddStartHour.Selected.Value), Value(ddStartMinute.Selected.Value), 0),
    Time(Value(ddEndHour.Selected.Value), Value(ddEndMinute.Selected.Value), 0),
    TimeUnit.Minutes
) & " minutes"
This approach is great for timesheet apps where users select hour and minute values from dropdowns.
Check out How to Clear/Reset Variables in Power Apps?
Show Difference as Years, Months, and Days Combined
This is the most asked question I see in the Power Apps community — “How do I show 2 years, 3 months, and 5 days instead of just a number?”
Here is how I approach it. The trick is to calculate each unit incrementally, working backwards:
With(
{
startDate: dpStartDate.SelectedDate,
endDate: dpEndDate.SelectedDate
},
With(
{
varYears: DateDiff(startDate, endDate, TimeUnit.Years),
varAfterYears: DateAdd(startDate, DateDiff(startDate, endDate, TimeUnit.Years), TimeUnit.Years)
},
With(
{
rawMonths: DateDiff(varAfterYears, endDate, TimeUnit.Months),
varAfterMonthsTemp: DateAdd(varAfterYears, DateDiff(varAfterYears, endDate, TimeUnit.Months), TimeUnit.Months)
},
With(
{
varMonths: If(varAfterMonthsTemp > endDate, rawMonths - 1, rawMonths),
varAfterMonths: DateAdd(varAfterYears, If(varAfterMonthsTemp > endDate, rawMonths - 1, rawMonths), TimeUnit.Months)
},
With(
{
varDays: DateDiff(varAfterMonths, endDate, TimeUnit.Days)
},
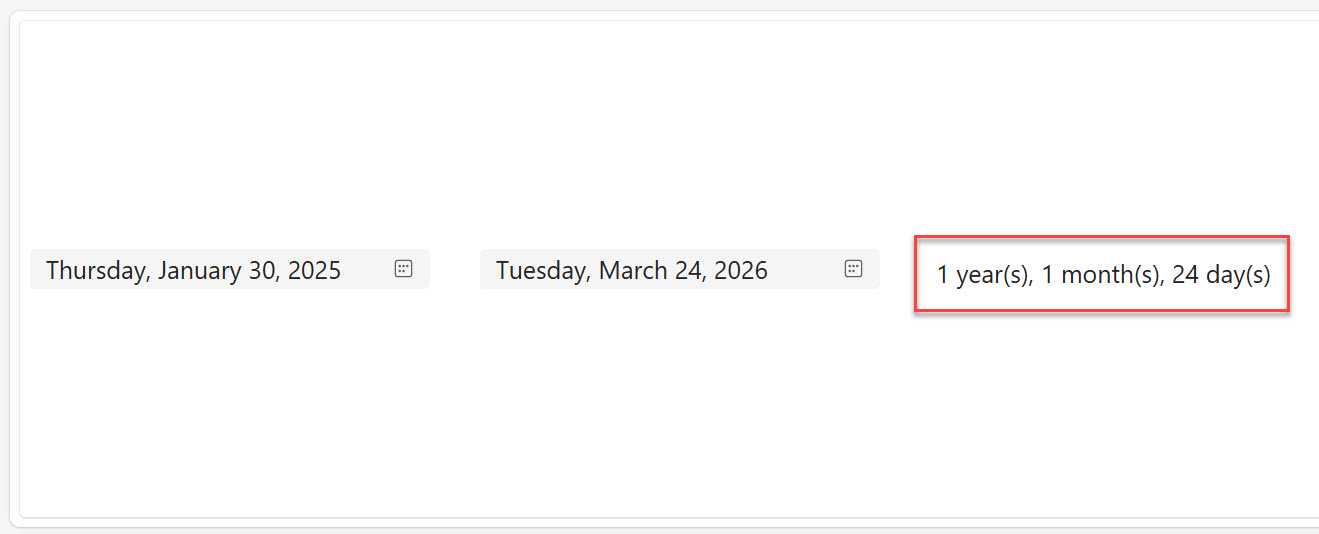
varYears & " year(s), " & varMonths & " month(s), " & varDays & " day(s)"
)
)
)
)
)
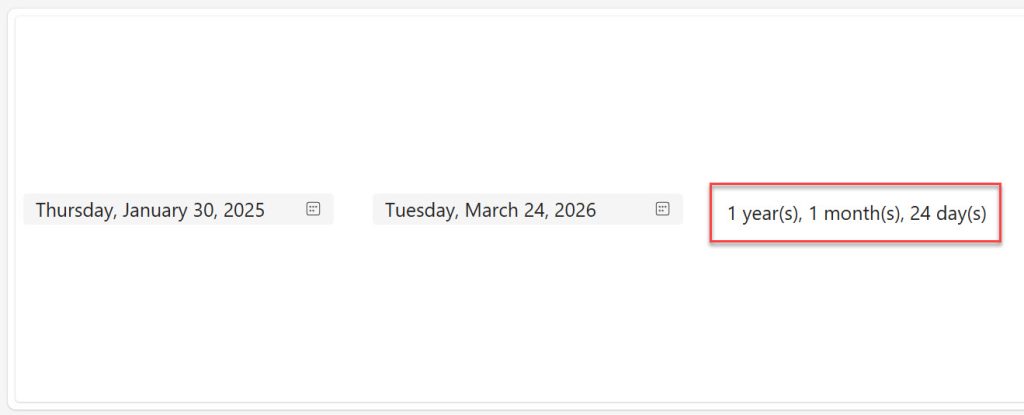
What this does:
- First, it calculates the complete years between the two dates.
- Then it moves the start date forward by those years, and calculates remaining complete months.
- Then it moves the date forward again by those months, and calculates the remaining days.
Example output: 1 year(s), 1 month(s), 24 day(s)
This is the most accurate way to represent a duration in Power Apps, and it properly honors the calendar (leap years, different month lengths, etc.).
You can see the exact output in the screenshot below:
Read How to Work With Power Apps Variables?
Calculate Age from Date of Birth
One of the most practical uses of DateDiff is building an age calculator in Power Apps. If you have a Date Picker called dpDOB for date of birth in a Power Apps canvas app:
DateDiff(dpDOB.SelectedDate, Today(), TimeUnit.Years) & " years old"
Want to make it more detailed and show months too?
With(
    {
        years: DateDiff(dpDOB.SelectedDate, Today(), TimeUnit.Years),
        afterYears: DateAdd(dpDOB.SelectedDate, DateDiff(dpDOB.SelectedDate, Today(), TimeUnit.Years), TimeUnit.Years)
    },
    years & " years, " & DateDiff(afterYears, Today(), TimeUnit.Months) & " months"
)
I use this in HR apps all the time to display age next to employee records.
Using DateDiff with Today() and Now()
Power Apps gives you two important functions for the current time:
Today()— Returns the current date with the time set to 12:00:00 AM (midnight). Use this when you only care about the date, not the time.Now()— Returns the current date and time. Use this when precision to the minute or second matters.
Important rule: Always match your comparison type. If you are comparing date-only values, use Today(). If you are comparing date-time values (like timestamps from a SharePoint list), use Now().
// Days remaining until a deadline
DateDiff(Today(), Date(2025, 12, 31), TimeUnit.Days) & " days until end of year"

// Hours since a record was created (using a SharePoint datetime column)
DateDiff(ThisItem.Created, Now(), TimeUnit.Hours) & " hours ago"
Handle Negative Results While Calculating
If the end date is before the start date, DateDiff returns a negative number. This is by design — it’s not a bug.
For example:
DateDiff(Date(2025, 12, 31), Date(2025, 01, 01), TimeUnit.Days) // Returns -364
If you want to always show a positive number regardless of the date order, wrap it with Abs():
Abs(DateDiff(dpStartDate.SelectedDate, dpEndDate.SelectedDate, TimeUnit.Days))
This is useful in scenarios where users might accidentally pick the end date before the start date, and you still want the app to display a meaningful result rather than a confusing negative value.
Fractional Results and Higher Precision
Because DateDiff always returns a whole number, it truncates. The way to get more precise results is to use a smaller unit and then divide.
Example: Get hours as a decimal (e.g., 2.5 hours)
DateDiff(TimeValue("09:45:00"), TimeValue("12:15:00"), TimeUnit.Minutes) / 60
This returns 2.5 — a much more useful result if you are building a timesheet or billing calculator.
Example: Get fractional days
DateDiff(startDateTime, endDateTime, TimeUnit.Hours) / 24
This approach lets you precisely control the level of detail you show to users.
Working with UTC and TimeZone Offsets
If your app pulls date-time values from SharePoint or Dataverse, those timestamps are stored in UTC. That means if you compare them directly with Now() (which is in the user’s local time), you will get incorrect results.
Power Apps has a TimeZoneOffset() function that returns the difference in minutes between the user’s local time and UTC.
Convert a UTC timestamp to local time:
DateAdd(UTCDateTime, -TimeZoneOffset(UTCDateTime), TimeUnit.Minutes)
Then calculate the difference:
DateDiff(
    DateAdd(ThisItem.Created, -TimeZoneOffset(ThisItem.Created), TimeUnit.Minutes),
    Now(),
    TimeUnit.Hours
) & " hours ago"
This is something a lot of makers miss, and it can cause off-by-hours bugs in production apps, especially when users are in different time zones.
Real-World Example: Leave Days Calculator in Power Apps
Now, let me give you a real-world example.
Say I want to build a simple leave request calculator where an employee picks a start and end date and the app shows how many working days (Monday to Friday) they are taking off.
Step 1: Add two Date Pickers — dpLeaveStart and dpLeaveEnd.
Step 2: Add a Label and set its Text property to calculate total calendar days:
"Total Calendar Days: " & DateDiff(dpLeaveStart.SelectedDate, dpLeaveEnd.SelectedDate, TimeUnit.Days) + 1
(I add 1 because DateDiff is exclusive of the start date by default — Day 1 itself is not counted.)
Step 3: To calculate a human-readable combined duration, use the nested With() formula from the earlier section.
Step 4: Add a validation message to show a warning if the end date is before the start date:
If(
    dpLeaveEnd.SelectedDate < dpLeaveStart.SelectedDate,
    "⚠️ End date cannot be before start date.",
    "Total Days: " & DateDiff(dpLeaveStart.SelectedDate, dpLeaveEnd.SelectedDate, TimeUnit.Days) + 1
)
This gives users a validation message.
Final Thoughts
As a Power Apps developer, you will often need to perform date calculations. I have used these exact formulas with DateDiff() in real client projects — from simple HR leave forms to complex project dashboards, etc.
The key things I want you to take away from this tutorial are:
- Always match your data types (date vs. date-time) before calculating.
- Use the nested
With()approach when you need years, months, and days combined. - Never forget the UTC offset issue when pulling timestamps from SharePoint or Dataverse.
- Add
+ 1when you need to count the start date as Day 1.
If you found this tutorial helpful, drop a comment below and let me know what kind of app you are building with it — I read every single one. And if you run into a specific date calculation challenge that I did not cover here, feel free to ask, and I will do my best to help.

I’m Bijay Kumar, a Microsoft Business Application MVP specializing in Power Automate. I have been honored 11 times. With over 18 years in the IT industry, I have practical experience in Power Apps, Power Automate, Power BI, Power Pages, and SharePoint Online. I also co-authored the book Microsoft Power Platform—A Deep Dive. Currently, I develop various apps using Power Apps and automate business processes for many clients in the USA using Power Automate. Read more.