For most of my Power Platform training, I start with this topic: creating an app from an Excel file in Microsoft Power Apps. This is easy, and you can follow it step by step here. In this tutorial, I will show you how to create an app from an Excel file in Power Apps.
I will also show another option to create an app from an Excel file: the “Start with data” option.
Power Apps: Create an App from an Excel File
Follow the step-by-step guide to create your first Power Apps app from an Excel file.
Step 1: Create And Format the Excel File
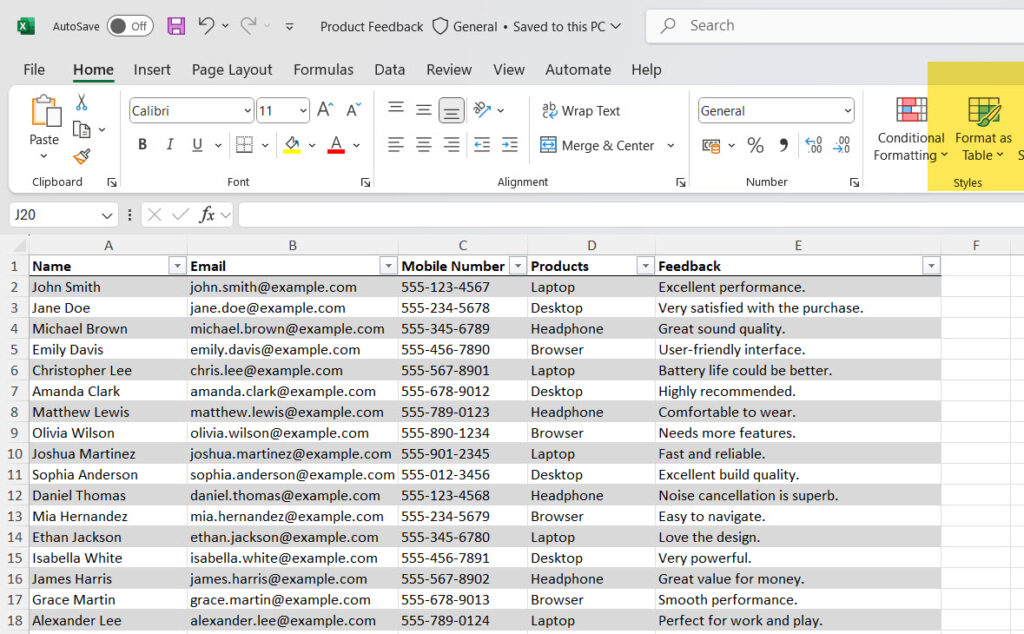
The first step is to create and format the Excel file. Here, I have created an Excel file having the below columns:
- Name
- Mobile Number
- Products
- Feedback
And I have added some data to it. Once you have added some data to it, you need to format the Excel as a table.
Select all the records from the Excel file, then Click on the Home tab -> Table Design -> Format as Table from the ribbon. Then, in the Create Table dialog box, check the checkbox “My table has headers.”
Here is how the Excel file looks like:
You can download and use this Excel file. You can use the same Excel file to build your Power Apps app.
Once the format as table option is done, we need to upload the Excel file to a cloud storage like SharePoint Online document library or OneDrive for Business. For this example, I will upload it to OneDrive for Business.
For this:
- Open OneDrive for Business -> + Add new -> Files upload.

- Then, browse and upload the file. The Excel file will be saved in the “My files” folder of OneDrive for Business. Now, we are good to go to the next step.
Step 2: Create The Power Apps App
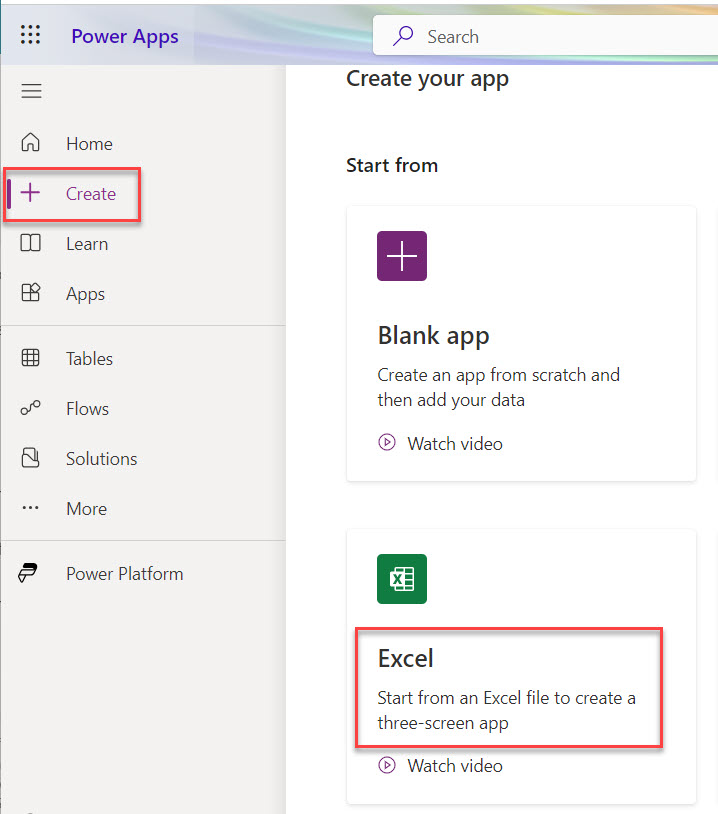
- Open make.powerapps.com and click + Create from the left navigation -> then click on the Excel option. The screenshot below is for your reference.
- Next, we need to add a connection to OneDrive for Business. If you already have a connection, you do not need to create one again. To create a new connection, click on the “+ New connection” button. Then select “OneDrive for Business” and click on Create, as in the screenshot below.
- Note: You need to allow access.

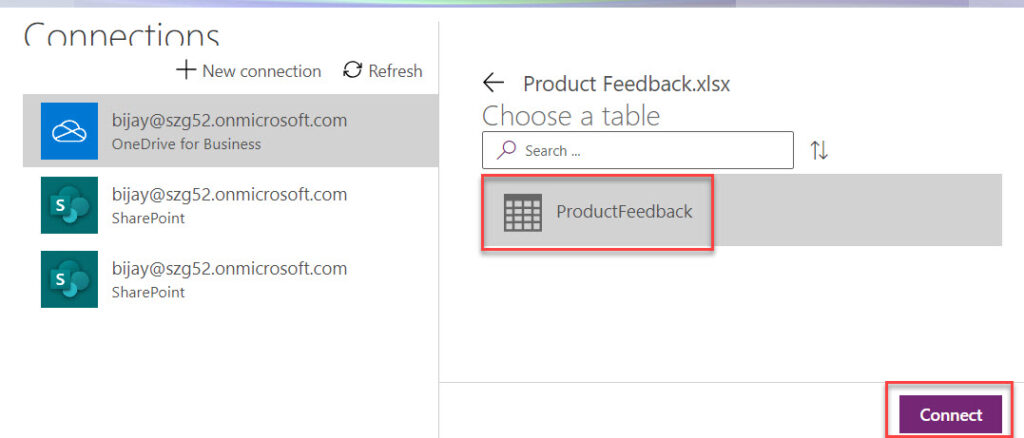
- Once the connection is successful, it will display the list of files presented in your OneDrive for Business. Choose the file that we have uploaded above. Once you select the file, it will display the table names. Choose the table name. In this example, I have only one table in the Excel file.
- Then click on the Connect button.
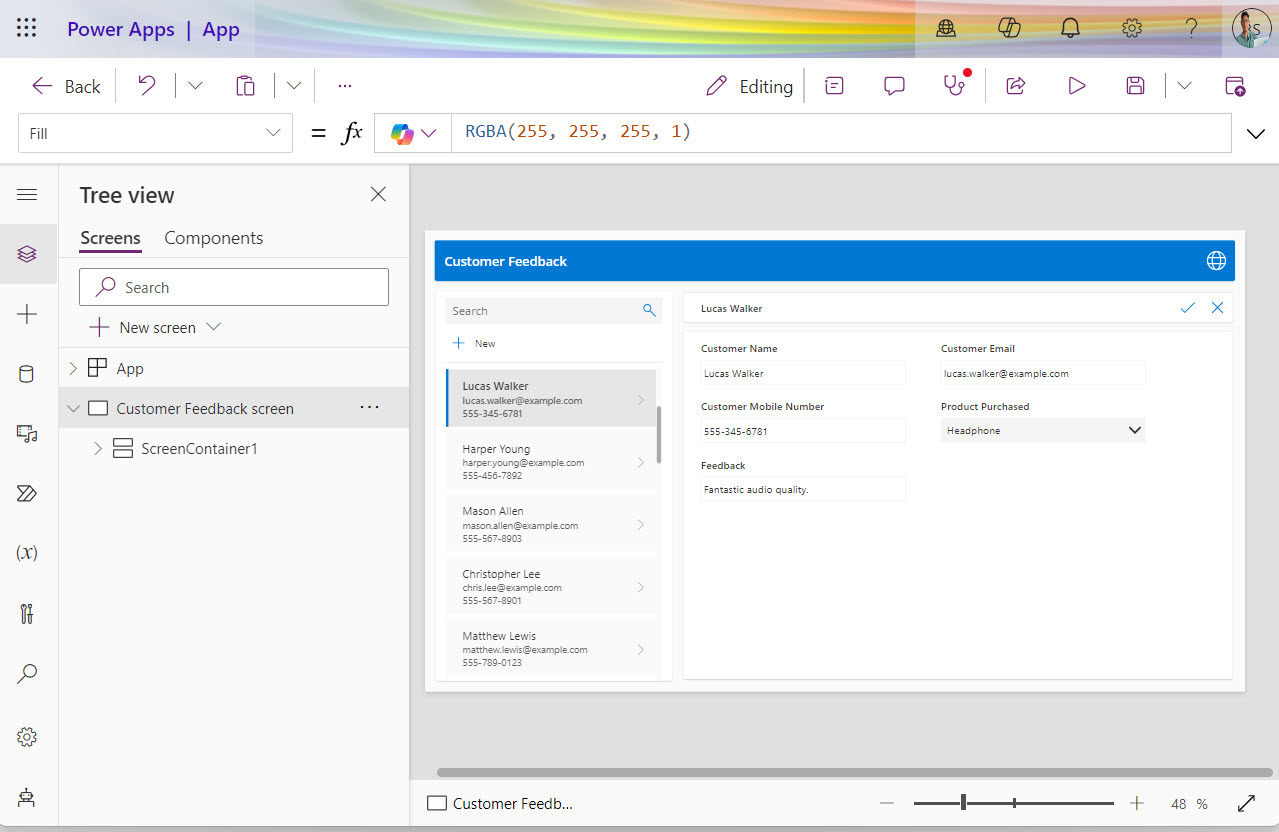
- Once you click on Connect, Power Apps will create a completely usable app with the three screens below.
- BrowseScreen1 – This screen displays all the items from the Excel file. It also has options like Refresh, Search, Sort, View item, and Add new item.
- DetailScreen1 – This displays the details of the selected item. It has options like Edit item and Delete item.
- EditScreen1 – This is the Edit item screen, where the user can edit an item. It has the option to Cancel the item or save the changes.
- You can see the app in the screenshot below. Below is the app’s browse screen.

Check out Create an App in Power Apps using Copilot
Step 3: Run the Canvas Power Apps App
- Once the App is created, you can run it anytime by clicking on the Preview the App button. Alternatively, press F5 to run the Power Apps canvas app.

- Once you preview it, you can navigate to different screens. Here, you can see the Submit Item screen. This is a fully functional canvas app.
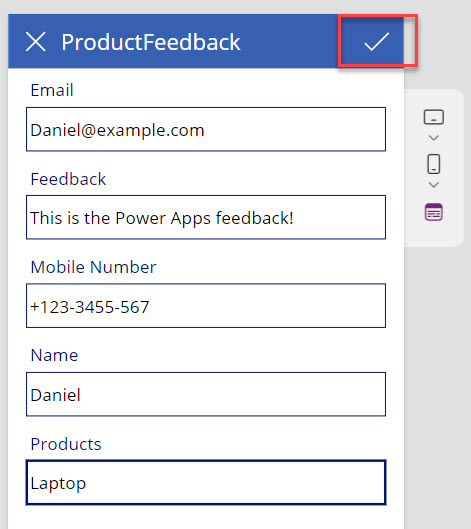
This is how to create an app from Excel in Power Apps.
Step 4: Save the Power Apps Canvas App
- In the next and final step, we can save the Power Apps canvas app. Click on the Save button, and then in the Save as dialog box, provide a name for the App and click Save. The output is in the screenshot below.

This is how to create and save a Power Apps canvas app from an Excel file.
Check out Build an App from Scratch using Power Apps
Create a Power Apps Canvas App from “Start With Data” Option
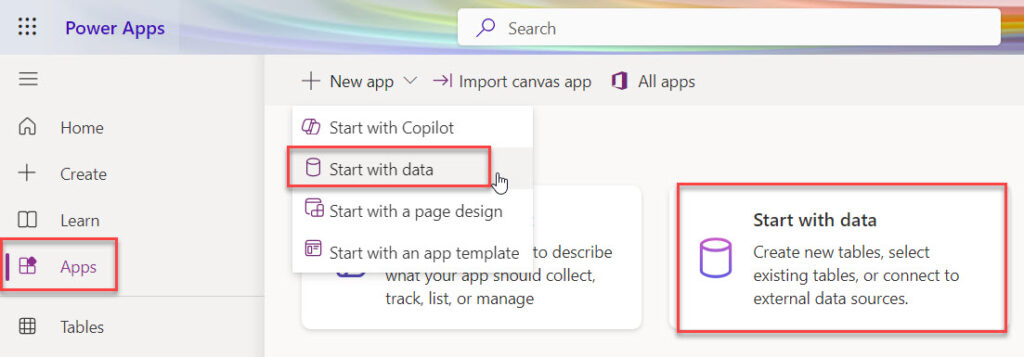
Now, let me show you another option to create a canvas app from an Excel file in Power App using the Start with Data option.
- Navigate to https://make.powerapps.com/ and then click on Apps -> Then click on “Start with data“. Otherwise, click on + New app -> Start with data, like in the screenshot below:
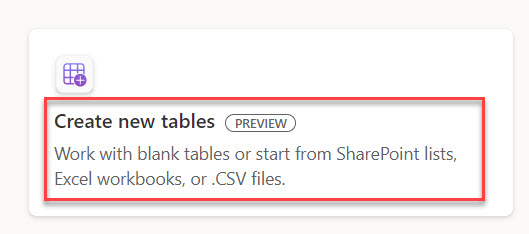
- Then, choose “Create new tables,” like the screenshot below.
- Now, it will give you different options like:
- Start with Copilot
- Import a SharePoint list
- Import an Excel file or .CSV
- Start from blanks
- Here, choose Import an Excel file or .CSV file.

- Now, it will show a pop-up, and you can upload the Excel or CSV file you want to use to create the app. Once you upload the file, it will show you like this.

- Then click on “Save and open app” which will open the fully functional app.
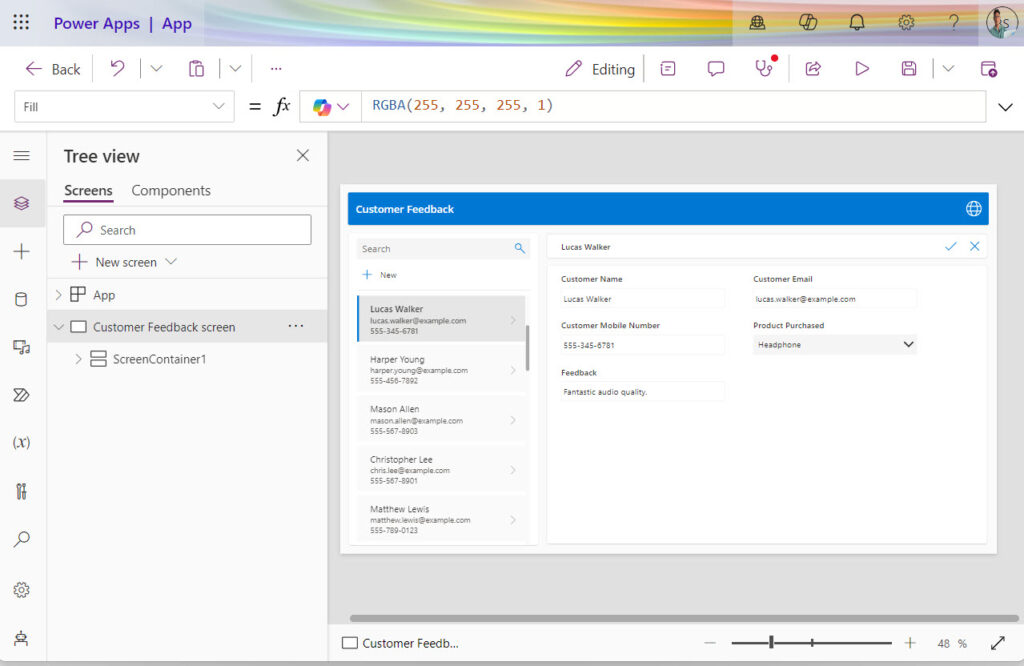
- This is a fully functional canvas app; you can Save and use the app in Power Apps.
This is another approach to creating a canvas app in Power Apps.
Conclusion
I hope you can create an app in Power Apps from an Excel file by following the above approaches.
You may also like:
- How to Set Control Value in Button Click on Power Apps?
- How to Create a Custom Theme in Power Apps?
- Data Table Control in Power Apps Canvas App

I’m Bijay Kumar, a Microsoft Business Application MVP specializing in Power Automate. I have been honored 11 times. With over 18 years in the IT industry, I have practical experience in Power Apps, Power Automate, Power BI, Power Pages, and SharePoint Online. I also co-authored the book Microsoft Power Platform—A Deep Dive. Currently, I develop various apps using Power Apps and automate business processes for many clients in the USA using Power Automate. Read more.