
Recently, during one of my Power Apps training sessions, someone asked me — “How do I check more than one condition at the same time? Do I have to keep nesting IF statements inside each other?” That’s actually a really common question, and it’s what pushed me to write this detailed tutorial.
In this tutorial, I will walk you through everything you need to know about using multiple IF statements in Power Apps — starting from the absolute basics all the way through advanced real-world patterns.
Here’s what I’ll cover:
- Basic IF statement syntax in Power Apps
- IF with a single condition
- IF with multiple unrelated conditions (no nesting needed)
- Nested IF statements in Power Apps
- IF with AND and OR operators
- IF with IsBlank and IsEmpty
- IF in label, button, and input controls
- IF for navigation and behavior formulas
- IF vs Switch — when to use which
- Real-world examples from beginner to advanced
Let me walk you through each one with practical, hands-on examples.
What Is the IF Function in Power Apps?
The IF function in Power Apps (Power Fx) is a conditional function. It checks whether a condition is true or false, and based on that, it returns different results or performs different actions. Think of it as the decision-maker inside your Power Apps app.
What makes Power Apps IF special — and different from Excel — is that you don’t have to nest multiple IF functions inside each other just to check multiple conditions. You can pass multiple condition-result pairs in a single IF formula, which makes your formulas much cleaner and easier to read.
The IF function works across canvas apps, model-driven apps, Dataverse formula columns, Power Pages, and even Copilot Studio. So once you learn this, you’ll be using a skill that spans the entire Microsoft Power Platform.
Power Apps IF Function Syntax
Before jumping into examples, let me show you the full syntax so you understand what each part means.
Single condition:
If( Condition, ThenResult, DefaultResult )
Multiple conditions in one IF (no nesting required):
If( Condition1, ThenResult1, Condition2, ThenResult2, DefaultResult )
Here’s what each argument means:
- Condition — The expression you want to test. This is usually a comparison like
Value > 10or a function likeIsBlank(TextInput1.Text). - ThenResult — The value or action returned when the condition is true.
- DefaultResult — Optional. Returned when no condition is true. If you skip this, Power Apps returns blank.
One important thing to remember: conditions are evaluated in order, and the evaluation stops as soon as a condition returns true. So if your first condition is true, Power Apps won’t even look at the second condition.
To do all the examples, I have created a responsive Power Apps canvas app. I suggest you create one and follow along with me.
Basic IF Statement Example in Power Apps
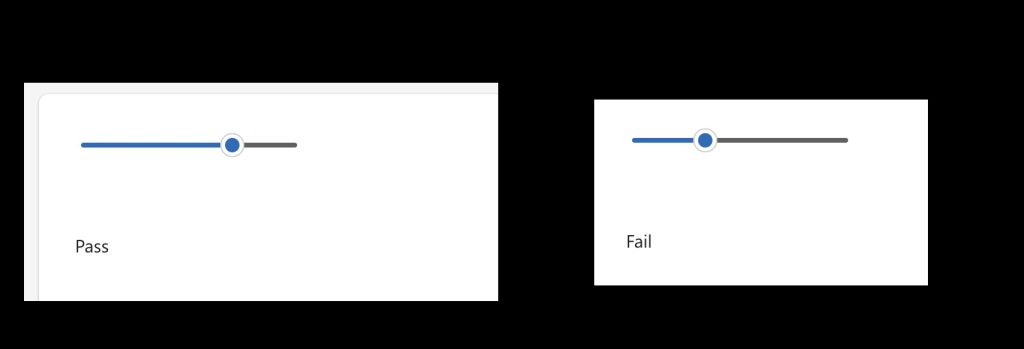
Let me start with the simplest possible example. Say you have a Slider control on your screen named Slider1, and you want to show a message in a Text control based on its value.
On the Text property of the label, write:
If( Slider1.Value >= 50, "Pass", "Fail" )
What this does:
- If the slider value is 50 or above → the label shows “Pass”
- If the slider value is below 50 → the label shows “Fail”
You can see the exact output in the screenshot below:
That’s your classic if-then-else pattern. Simple, clean, and effective.
IF with Multiple Conditions in Power Apps (No Nesting)
This is where Power Apps really shines compared to Excel. In Power Apps, you can chain multiple conditions inside a single IF formula without nesting one inside another.
Let’s say I want to show different messages in a Text (modern label control) based on a quiz score stored in a variable called QuizScore. You can set a global variable in the OnVisible property of the Screen in the Power Apps App.
On the Text property of a Text control, write:
If(
    QuizScore >= 90, "Excellent",
    QuizScore >= 75, "Good",
    QuizScore >= 50, "Average",
    "Below Average"
)
Here’s how this works step by step:
- If the score is 90 or above → “Excellent”
- If not, and the score is 75 or above → “Good”
- If not, and the score is 50 or above → “Average”
- If none of the conditions are true → “Below Average” (this is the default result)
This is the power of multiple IF conditions in one formula. No nested IFs, no confusion. I use this pattern all the time in my Canvas apps.
Nested IF Statements in Power Apps
Even though Power Apps allows multiple conditions in one IF, there are still situations where you’ll want to use nested IF — especially when you need to check a second condition only if a first one is true.
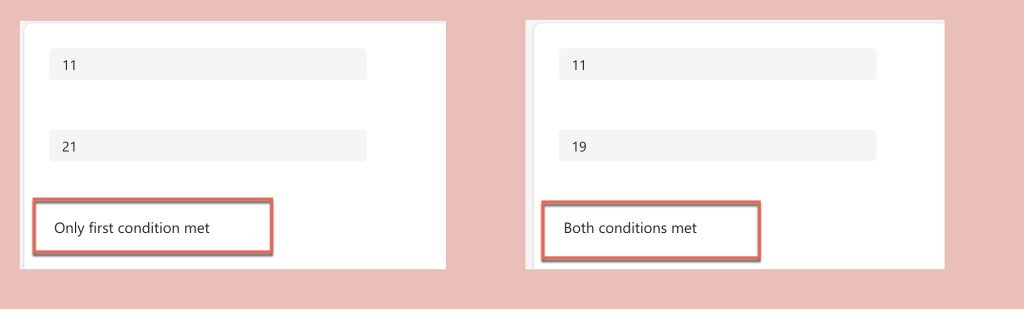
Let’s say I have two text input controls, TextInput1 and TextInput2, and I want to check both values before deciding what to display.
On the Text property of a modern Text control, write:
If(
    Value(TextInput1.Text) > 10,
    If(
        Value(TextInput2.Text) < 20,
        "Both conditions met",
        "Only first condition met"
    ),
    "First condition failed"
)
Here’s the logic breakdown:
- First, it checks if
TextInput1value is greater than 10. - If true, it goes inside and checks if
TextInput2is less than 20. - If both conditions are true → “Both conditions met”
- If only the outer condition is true → “Only first condition met”
- If the outer condition is false → “First condition failed”
You can see the exact output in the screenshot below:
Nested IFs are useful when your second condition depends on the first. But don’t over-nest — more than 2-3 levels deep, and your formula becomes very hard to read. That’s when I’d switch over to the Switch function or use AND/OR operators instead.
Check out Calculate the Difference Between Two Dates in Power Apps
Power Apps IF with AND and OR Operators
Another approach I prefer when combining multiple conditions in Power Apps if condition is using the && (AND) and || (OR) operators inside a single condition.
Using AND (&&)
I want to check two things at once — if a user’s age is between 18 and 60:
If(
    Value(TextInput_Age.Text) >= 18 && Value(TextInput_Age.Text) <= 60,
    "Eligible",
    "Not Eligible"
)
Both conditions must be true for it to return “Eligible”. I find this cleaner than nesting when I just need to combine two checks into one pass/fail decision.
Using OR (||)
Now, say I want to show a message if the department is either “IT” or “Finance”:
If(
    Dropdown_Dept.Selected.Value = "IT" || Dropdown_Dept.Selected.Value = "Finance",
    "Tech or Finance Team",
    "Other Department"
)
As long as either one of those conditions is true, it returns “Tech or Finance Team”.
Combining AND and OR
You can also combine them. Let’s say I want to approve a request only if the amount is under 5000 AND the status is either “Pending” or “Draft”:
If(
    Value(TextInput_Amount.Text) < 5000 &&
    (Dropdown_Status.Selected.Value = "Pending" || Dropdown_Status.Selected.Value = "Draft"),
    "Auto Approved",
    "Needs Manual Review"
)
Notice I’ve wrapped the OR conditions in parentheses. This is important — it controls the order of evaluation, just like in math.
Read Create a Custom Theme in Power Apps
IF with IsBlank and IsEmpty in Power Apps
One of the most practical uses of IF in Power Apps is validating form inputs before submission. I use this in almost every app I build.
IsBlank check
If I want to make sure a text field is filled in before proceeding:
If(
    IsBlank(TextInput_Name.Text),
    "Please enter your name",
    "Hello, " & TextInput_Name.Text
)
Multiple field validation
Here’s a real-world pattern I use on the OnSelect property of a Submit button to validate multiple fields at once:
If(
    IsBlank(TextInput_Name.Text),
    Notify("Name is required", NotificationType.Error),
    IsBlank(TextInput_Email.Text),
    Notify("Email is required", NotificationType.Error),
    IsBlank(Dropdown_Dept.Selected.Value),
    Notify("Please select a department", NotificationType.Error),
    SubmitForm(Form1)
)
This is one of my favorite patterns. It chains multiple validation checks, and only if all pass does it actually submit the form. Clean, readable, and very effective. This method you are going to use in many Power Apps apps.
Power Apps IF in Modern Text, Button, and Input Controls
Now let me show you how IF is used across different control properties in a canvas app.
IF on a Text’s Text Property
Show a user’s status based on a dropdown selection. Take a dropdown control and add a few options such as: “Active”, On Leave” and “Resigned”. You can take a modern Text control, and on the Text property, you can write the following formula.
If(
    Dropdown_Status.Selected.Value = "Active",
    "✅ Active Employee",
    Dropdown_Status.Selected.Value = "On Leave",
    "🟡 Currently On Leave",
    Dropdown_Status.Selected.Value = "Resigned",
    "❌ No Longer Active",
    "Unknown Status"
)
I executed the above formula and you can see the exact output in the screenshot below:

IF on a Button’s DisplayMode Property
I often use IF to enable or disable buttons based on form state:
If(
    IsBlank(TextInput_Name.Text) || IsBlank(TextInput_Email.Text),
    DisplayMode.Disabled,
    DisplayMode.Edit
)
This disables the button until both required fields are filled in. No separate validation logic needed — the UI does the work for you.
IF on a Label’s Color Property
I use this to change colors dynamically based on values:
If(
    Value(TextInput_Score.Text) >= 75,
    Color.Green,
    Value(TextInput_Score.Text) >= 50,
    Color.Orange,
    Color.Red
)
This gives users an immediate visual indicator — green for good, orange for average, red for poor.
IF on a Control’s Visible Property
Show or hide controls based on conditions. Suppose you want to show a Text input control. If the user chooses the Other option in a Power Apps dropdown control, you can write the formula below in the Visible property.
If(
    Dropdown_Category.Selected.Value = "Other",
    true,
    false
)
Or more simply:
Dropdown_Category.Selected.Value = "Other"
Read Data Table Control in Power Apps Canvas App
Power Apps IF in Behavior Formulas (OnSelect)
So far, most of the examples returned a value (text, color, display mode). But IF can also execute actions in behavior formulas like OnSelect. This is where things get really powerful.
Example: Navigate based on user role
Let’s say I want to send users to different screens based on their role. On a button’s OnSelect property:
If(
    User().Email = "admin@company.com",
    Navigate(AdminScreen, ScreenTransition.Fade),
    Navigate(UserScreen, ScreenTransition.Fade)
)
Example: Show notifications and patch data conditionally
If(
    IsBlank(TextInput_Title.Text),
    Notify("Title cannot be empty", NotificationType.Warning),
    Patch(
        'Project List',
        Defaults('Project List'),
        {
            Title: TextInput_Title.Text,
            Status: "Active"
        }
    );
    Notify("Record saved successfully!", NotificationType.Success);
    Navigate(HomeScreen, ScreenTransition.None)
)
This is a real pattern I use when building forms connected to SharePoint lists. It validates, then saves, then shows a success notification, then navigates — all in one IF formula.
IF vs Switch Function in Power Apps
One question I get a lot is — “Should I use IF or Switch?” Here’s how I think about it.
| Scenario | Best Choice |
|---|---|
| One condition, two outcomes | If |
| Multiple unrelated conditions | If with chained conditions |
| One expression against many specific values | Switch |
| Complex logical expressions (AND, OR) | If |
| Checking dropdown/variable against a list of exact values | Switch |
Here’s the same logic written two different ways so you can see the difference:
Using IF:
If(
    Dropdown_Priority.Selected.Value = "High", "🔴 High Priority",
    Dropdown_Priority.Selected.Value = "Medium", "🟡 Medium Priority",
    Dropdown_Priority.Selected.Value = "Low", "🟢 Low Priority",
    "No Priority Set"
)
Using Switch:
Switch(
    Dropdown_Priority.Selected.Value,
    "High", "🔴 High Priority",
    "Medium", "🟡 Medium Priority",
    "Low", "🟢 Low Priority",
    "No Priority Set"
)
Both return the same result. I prefer Switch when I’m comparing one value against a list of exact matches because it’s much easier to read and maintain. I use IF when my conditions involve ranges, comparisons, or logical operators.
Check out Clear/Reset Variables in Power Apps
Power Apps Multiple IF Statements: Real-World Examples
Now let me put it all together with some more complex, real-world examples.
Example 1: Approval Tier Logic
I’m building an expense approval app where the approval tier is determined by the amount entered. On the Text property of a label:
If(
    Value(TextInput_Amount.Text) <= 500,
    "Auto Approved",
    Value(TextInput_Amount.Text) <= 2000,
    "Manager Approval Required",
    Value(TextInput_Amount.Text) <= 10000,
    "Director Approval Required",
    "CFO Approval Required"
)
Example 2: Dynamic Form Validation with Multiple Fields
On the OnSelect property of a Submit button:
If(
    IsBlank(TextInput_Name.Text) || IsBlank(TextInput_Email.Text) || IsBlank(DatePicker_Start.SelectedDate),
    Notify("Please fill in all required fields", NotificationType.Error),
    !IsMatch(TextInput_Email.Text, Match.Email),
    Notify("Please enter a valid email address", NotificationType.Error),
    DatePicker_Start.SelectedDate > DatePicker_End.SelectedDate,
    Notify("Start date cannot be after end date", NotificationType.Error),
    Patch(
        LeaveRequests,
        Defaults(LeaveRequests),
        {
            EmployeeName: TextInput_Name.Text,
            Email: TextInput_Email.Text,
            StartDate: DatePicker_Start.SelectedDate,
            EndDate: DatePicker_End.SelectedDate,
            Status: "Pending"
        }
    );
    Notify("Leave request submitted!", NotificationType.Success);
    ResetForm(Form1)
)
This is a real multi-step validation pattern. It checks each field in order, and only if all validations pass does it save the record to a SharePoint list and reset the form.
Example 3: Color-Coded Status Column in a Gallery
In a gallery bound to a SharePoint list, I use this on the Fill property of a rectangle shape to color-code each row based on status:
If(
    ThisItem.Status = "Completed", RGBA(198, 239, 206, 1),
    ThisItem.Status = "In Progress", RGBA(255, 235, 156, 1),
    ThisItem.Status = "Overdue", RGBA(255, 199, 206, 1),
    RGBA(242, 242, 242, 1)
)
This gives each gallery item a green, yellow, red, or grey background based on the task status — a clean visual pattern that users immediately understand.
Example 4: IF with User() for Role-Based Visibility
I often need to show certain sections only to specific users or groups. On the Visible property of a container or section:
If(
    User().Email = "admin@yourcompany.com" ||
    !IsBlank(LookUp(AdminUsers, Email = User().Email)),
    true,
    false
)
This checks if the logged-in user is either a hardcoded admin or exists in a SharePoint list called AdminUsers. If either condition is true, the control is visible.
Common Challenges and How to Avoid Them
Here are a few things I’ve seen trip people up when working with multiple IF statements in Power Apps:
- Forgetting that conditions are evaluated in order — If your first condition is too broad, it will catch everything and the remaining conditions never run. Always put your most specific conditions first.
- Missing the DefaultResult — If you leave out the final default value and no condition is true, Power Apps returns blank. For text labels, this means an empty display. Always add a fallback.
- Over-nesting — Deeply nested IFs are hard to read and debug. Use chained conditions, AND/OR operators, or Switch instead.
- Using = instead of == for comparison — In Power Fx, you use a single
=for both assignment and comparison. This is different from other languages. Don’t type==. - Mixing data types — Make sure you’re comparing the right data types. If a field returns text, wrap it in
Value()before comparing it to a number.
Conclusion
In this tutorial, I walked you through Power Apps multiple IF statements from the ground up. Here’s a quick recap of what I covered:
- Basic IF syntax and single condition usage
- Chaining multiple conditions in one IF formula
- Nested IF statements when one condition depends on another
- Using AND (
&&) and OR (||) operators - Validating forms with IsBlank and IsEmpty
- Using IF on labels, buttons, color properties, and visibility
- IF in OnSelect behavior formulas
- IF vs Switch — when to use each
- Real-world advanced examples, including approval tiers, form validation, gallery color-coding, and role-based visibility
The IF function is probably the most used formula in any Power Apps canvas app. You will use this with chaining conditions and combining it with other functions in many apps. I hope the above practical examples help you. If you have any questions or want me to cover a specific scenario, feel free to drop a comment below!
You may also like the following tutorials:

I’m Bijay Kumar, a Microsoft Business Application MVP specializing in Power Automate. I have been honored 11 times. With over 18 years in the IT industry, I have practical experience in Power Apps, Power Automate, Power BI, Power Pages, and SharePoint Online. I also co-authored the book Microsoft Power Platform—A Deep Dive. Currently, I develop various apps using Power Apps and automate business processes for many clients in the USA using Power Automate. Read more.