If you are getting started with Microsoft Copilot Studio and want to build your first AI agent without any coding, this tutorial is for you. In this step‑by‑step guide, you will create a simple question‑and‑answer agent, test it inside Copilot Studio, and then publish it to a demo website so others can try it.
This is a great foundation before you move into more advanced topics like integrating with Power Automate, Dataverse, or SharePoint.
What you will build and prerequisites
In this tutorial, you will:
- Create a new Copilot Studio agent from scratch.
- Configure a basic persona and instructions so the agent behaves like an HR assistant.
- Add a knowledge source for your agent.
- Test the agent in the built‑in test pane.
- Publish the agent to a public demo website.
Before you begin, make sure you have:
- A Microsoft 365 tenant with Copilot Studio available or a trial enabled.
- The correct license and permission to create agents in your environment.
- Access to at least one environment (for example: Dev, Test, or Default).
If you already work with Power Apps or Power Automate, you will feel at home in the interface.
Step 1: Open Copilot Studio and choose the right environment
First, sign in to Microsoft 365 and open Copilot Studio (https://copilotstudio.microsoft.com/) from the app launcher or via the direct URL provided by your admin.
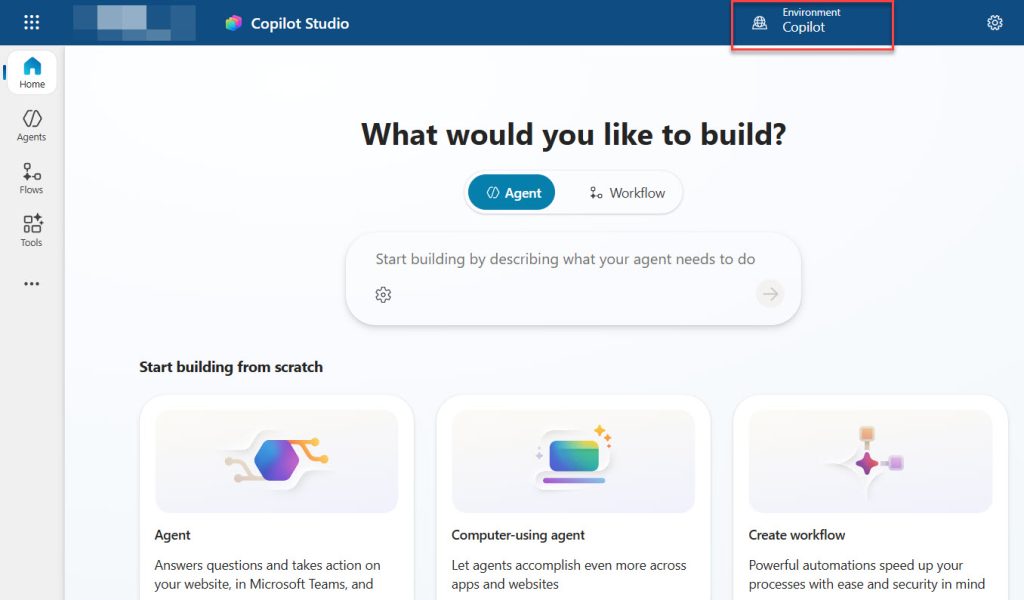
At the top of the Copilot Studio home page, you will see an environment selector. This works just like environments in Power Apps and Power Automate. If you have multiple environments, choose a Dev or Sandbox environment for experimentation. This keeps your test agents separate from production workloads.
If you only see a single “Default” environment, that is fine for learning and testing.
Here is a screenshot showing that I chose one development environment.
Step 2: Create a new Copilot Studio agent
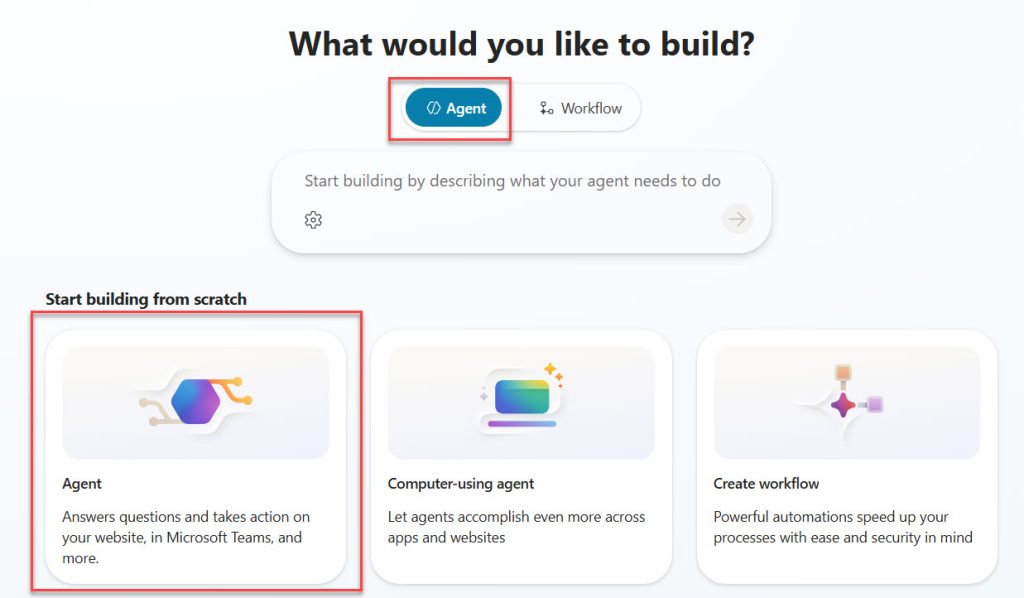
On the Copilot Studio home page, click the button to create a New agent. You can see the screenshot below of how the recent Copilot Studio home page looks. Choose Agent and then click on Agent from the “Start building from scratch” option.
You will see a simple wizard:
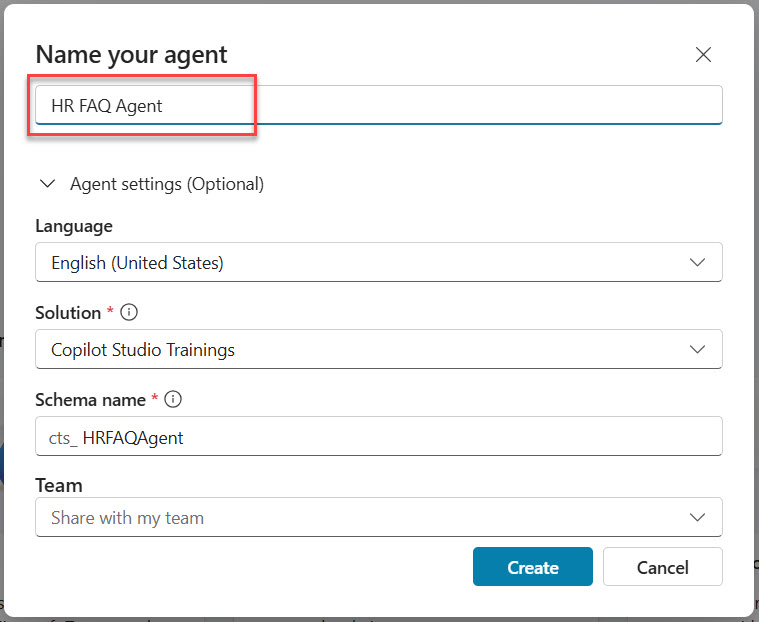
- Name – Give your agent a meaningful name, for example:
HR FAQ Agent. - Description – Describe what this agent does, such as “Answers common HR and leave policy questions for employees”.
- Language – Choose the primary language for the conversations (for example, English).
- Region or environment settings – Keep the default for now unless your organization has specific requirements.
After you confirm, Copilot Studio will create the agent with some default system topics and capabilities. These built‑in topics handle basic greetings, conversation endings, and fallback behavior.
You can see the screenshot below for your reference. Here, the agent’s name is important.
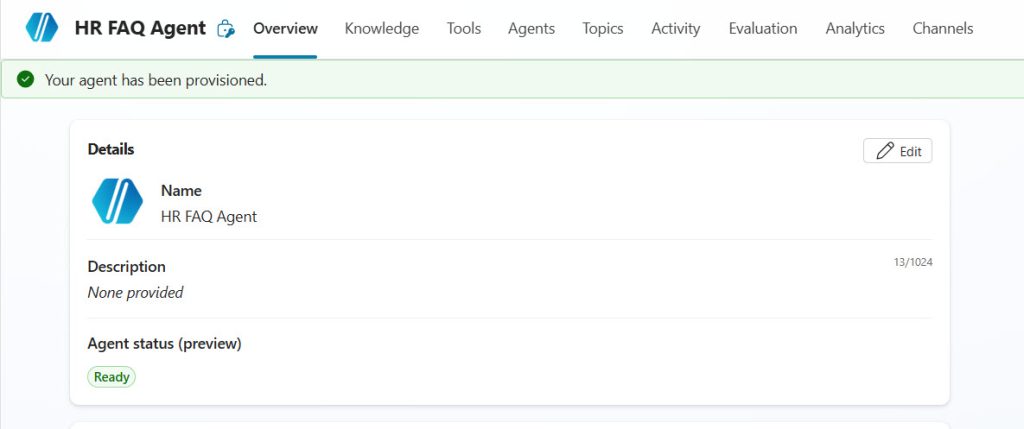
This might take a few seconds to be ready. Wait, till you get a confirmation message like “Your agent has been provisioned”. Here is a screenshot for your reference.
You will customize the agent in the next steps.
Check out How to Monitor Token Usage by AI Model in Copilot Studio
Step 3: Update Agent details
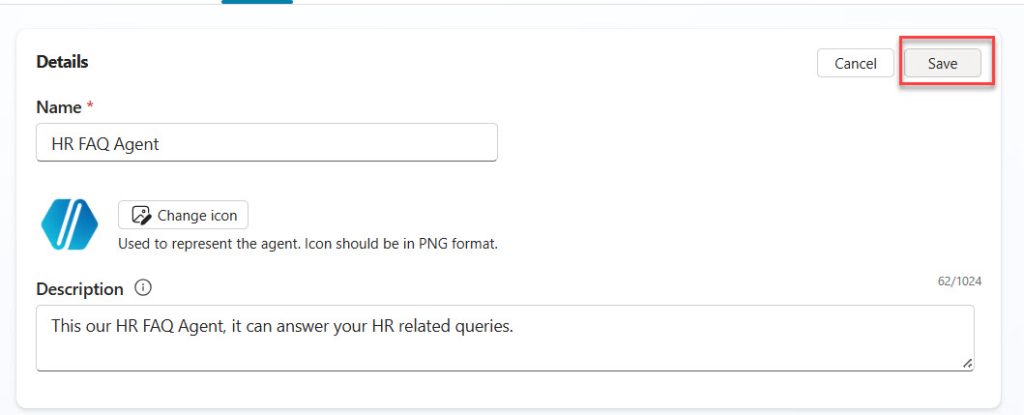
In the Details section, you can customize the basic information for your agent:
- Change the Agent name.
- Upload or replace the Agent icon.
- Provide or update the Agent description.
Configure these settings as shown in the screenshot below.
Step 4: Select your Agent’s model
In the Model section, choose the AI model that your agent will use to understand user requests, generate responses, and perform reasoning tasks.
As shown in the screenshot below, Copilot Studio provides access to multiple AI models from different providers, including OpenAI and Anthropic. You can select the model that best matches your business requirements and use case.
Some available options include:
- GPT-5 Chat – Optimized for general-purpose conversations and everyday tasks.
- GPT-5 Auto – Automatically switches between chat and reasoning capabilities as needed.
- GPT-5 Reasoning – Designed for complex problem-solving and advanced reasoning scenarios.
- GPT-5.3 Chat – Suitable for general chat-based interactions.
- GPT-4.1 – Provides fast responses and efficient analysis.
- Claude Sonnet 4.5 / 4.6 – Well-suited for content creation, question answering, and general business tasks.
- Claude Opus 4.6 / 4.7 / 4.8 – Intended for deep reasoning, complex workflows, and structured problem-solving.
Here is a screenshot for your reference. I chose the Claude Sonnet 4.6.

Note: The models available in your environment may vary depending on your organization’s licensing, region, and administrator settings. Select the model that best aligns with your agent’s expected workload and performance requirements, as shown in the screenshot below.
Step 5: Configure the agent’s persona and instructions
Every good agent needs a clear role and tone. In Copilot Studio, this is controlled by the instructions (similar to a system prompt).
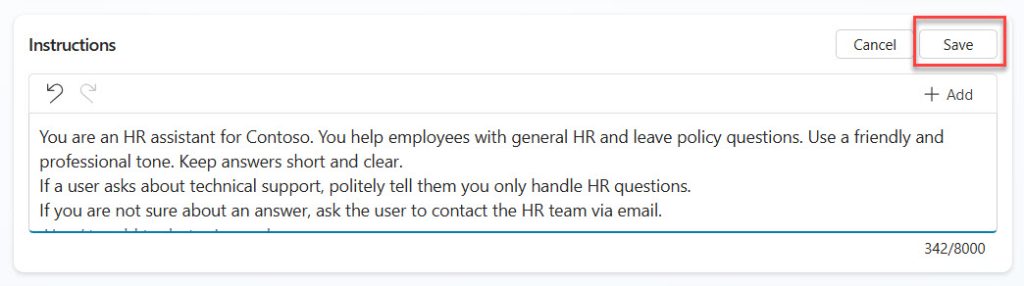
In the Instructions section, click on the Edit icon and describe what the agent should do and how it should behave.
Add something like this (you can rewrite in your own words):
- “You are an HR assistant for Contoso. You help employees with general HR and leave policy questions. Use a friendly and professional tone. Keep answers short and clear.”
Then add a few simple boundaries:
- “If a user asks about technical support, politely tell them you only handle HR questions.”
- “If you are not sure about an answer, ask the user to contact the HR team via email.”
It should look like the screenshot below.
These instructions help shape the agent’s personality and provide basic guardrails. You can refine them later once you observe real conversations.
Step 6: Add a Knowledge Source to Your Agent
Knowledge sources help your agent provide accurate, context-aware responses by grounding answers in your organization’s content. In this example, a PDF document stored on the local computer is uploaded and used as the agent’s knowledge source.
Step 1: Open the Add Knowledge Dialog
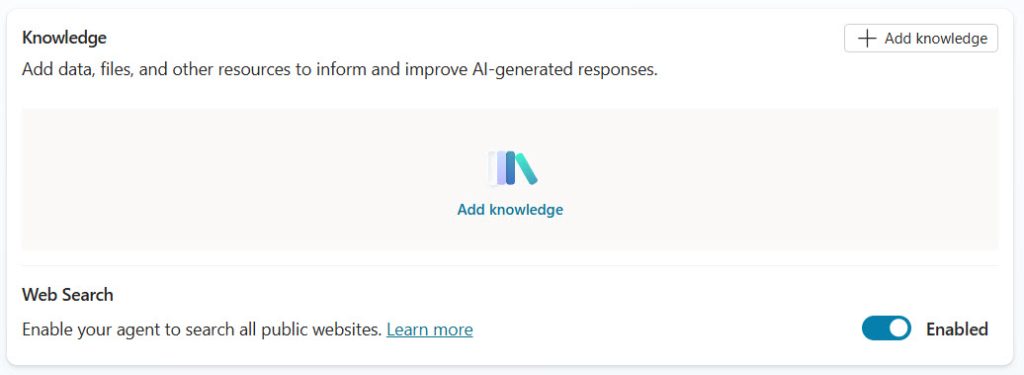
Click Add knowledge from the Knowledge section of the agent.
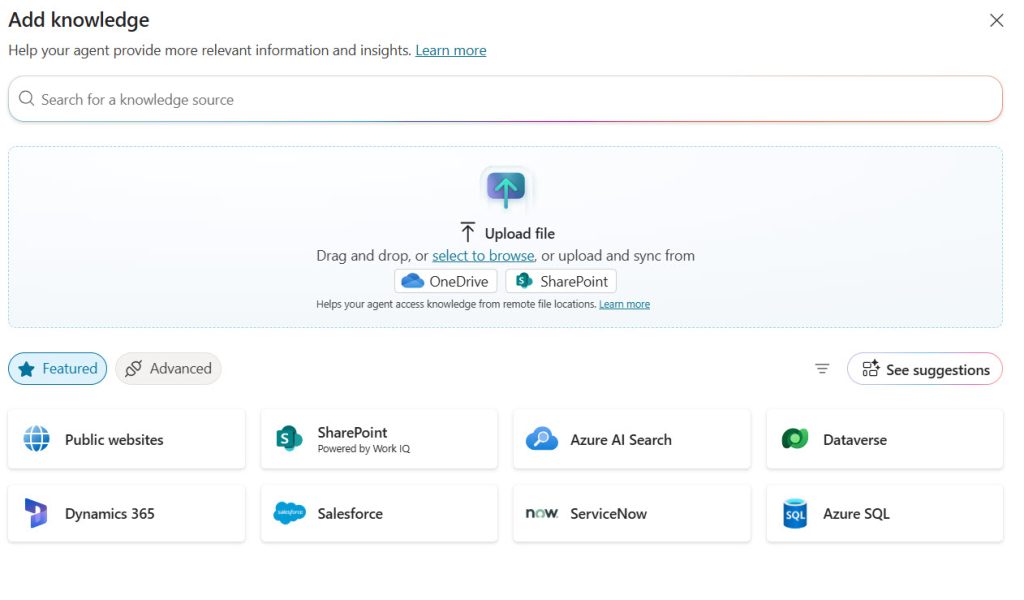
As shown in the screenshot below, Copilot Studio provides multiple knowledge source options, including:
- Upload a file from your local device
- OneDrive
- SharePoint
- Public websites
- Azure AI Search
- Dataverse
- Dynamics 365
- Salesforce
- ServiceNow
- Azure SQL
Since the knowledge source is stored locally, select Upload file and browse to the PDF document.
Step 2: Upload the PDF Document
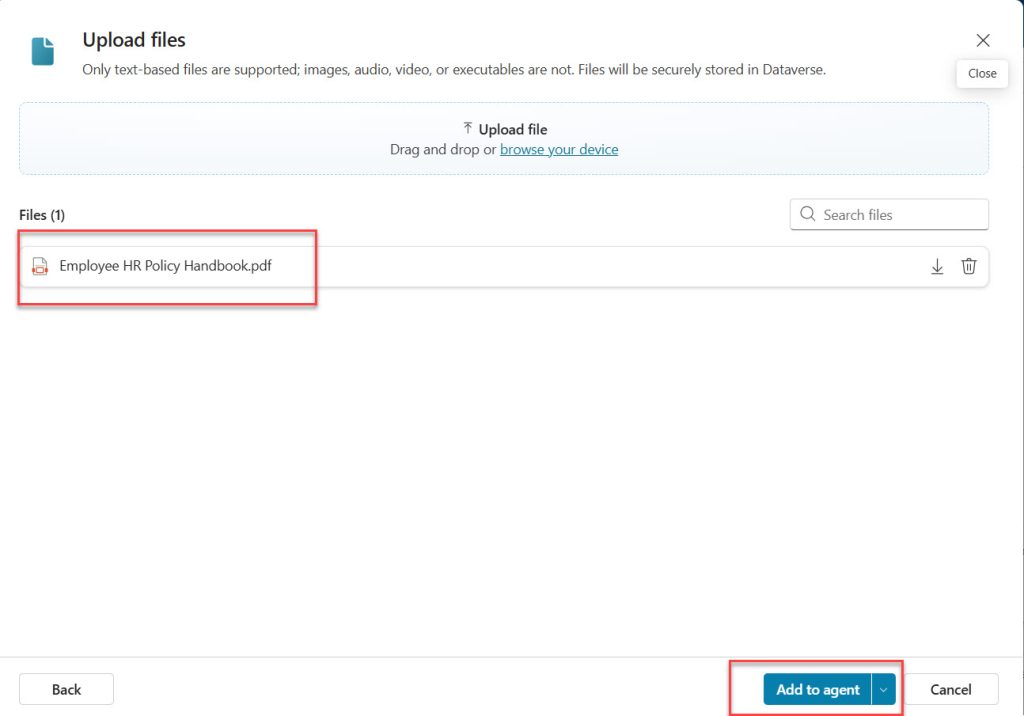
After selecting the file, Copilot Studio displays the uploaded document in the file list.
In this example, the Employee HR Policy Handbook.pdf file has been uploaded successfully and is ready to be added to the agent.
To continue, click Add to agent.
Note: Copilot Studio currently supports text-based files. The uploaded content is processed and indexed so the agent can use it when generating responses.
Step 3: Verify the Knowledge Source
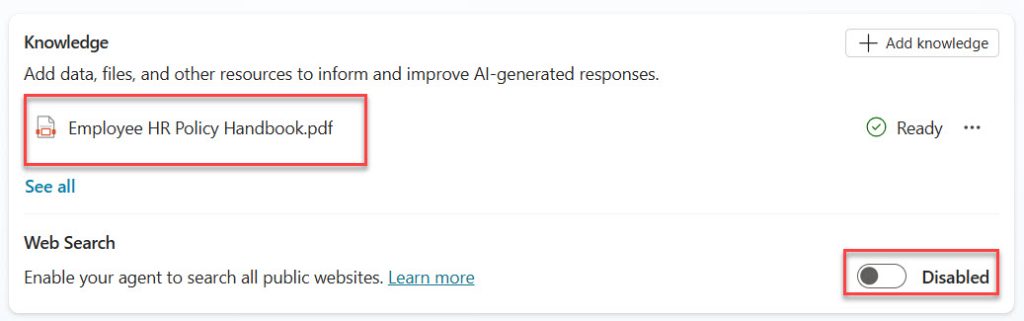
Once the upload is complete, the document appears in the Knowledge section of the agent.
A Ready status indicates that the file has been successfully processed and is available for the agent to use when answering user questions.
In this example, the Employee HR Policy Handbook.pdf document is now connected to the agent and can be used to answer HR-related queries based on the information contained in the handbook.
Step 4: Disable Web Search
By default, you can optionally enable Web Search to allow the agent to retrieve information from public websites.
For this HR policy agent, Web Search has been disabled, as shown in the screenshot below.
Disabling Web Search ensures that:
- Responses are based only on approved internal knowledge sources.
- The agent does not pull information from external websites.
- Users receive answers that are consistent with organizational policies and documentation.
- The risk of providing conflicting or outdated public information is reduced.
This approach is recommended for scenarios involving internal policies, employee handbooks, compliance documents, standard operating procedures (SOPs), and other organization-specific content.
Step 7: Test your agent in the Test pane
Before publishing, always test the agent inside Copilot Studio.
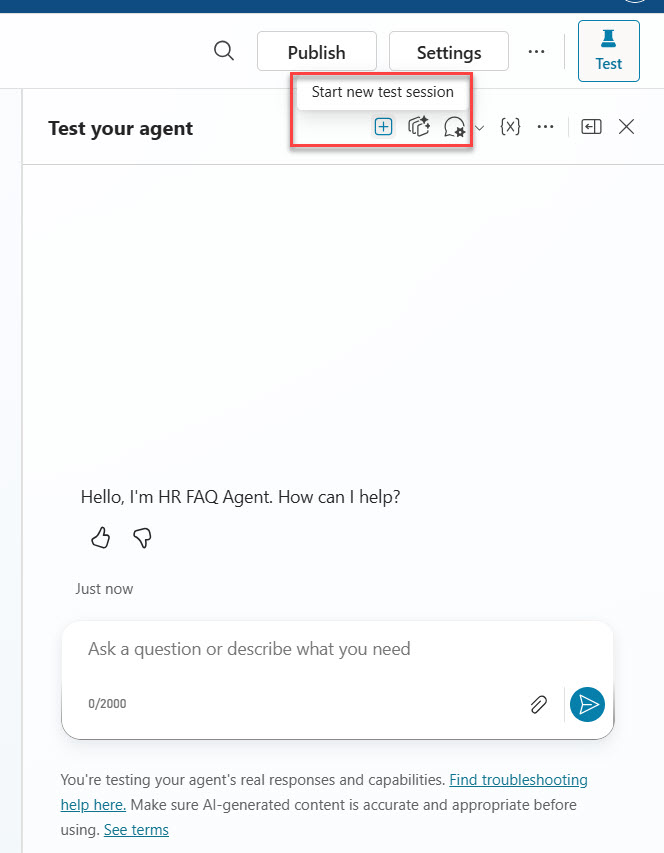
Before testing your agent with a new query, start a fresh test session to clear the existing conversation context. This ensures that the agent responds as if it is interacting with a new user and prevents previous messages from influencing the results.
- Open the Test your agent pane by clicking the Test button in the upper-right corner.
- In the test pane toolbar, click the Start new test session icon (highlighted in the screenshot below).
- A new conversation session will begin, and the agent will be ready to receive a fresh query.
This is especially useful when validating new topics, testing agent changes, or troubleshooting responses after making updates to your Copilot Studio agent.
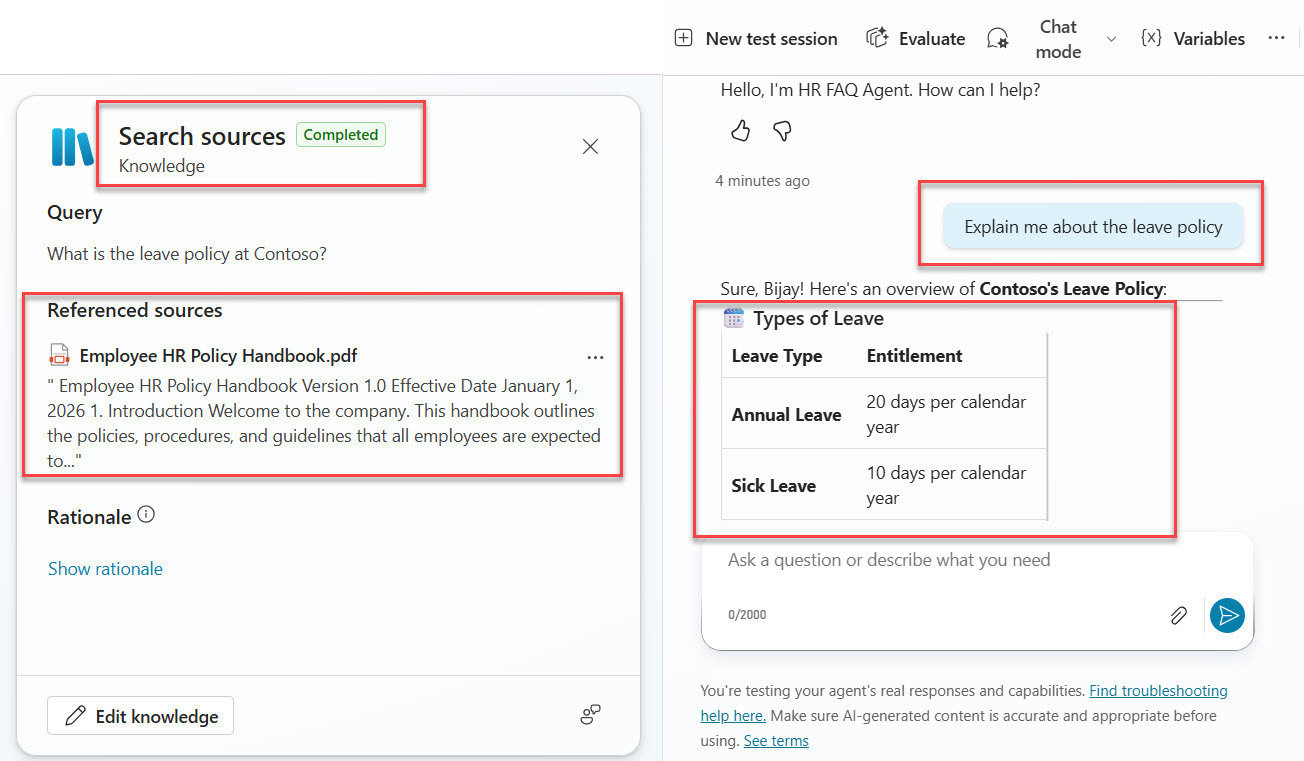
After starting a new test session, enter a question in the test pane to verify how your agent responds using the configured knowledge sources.
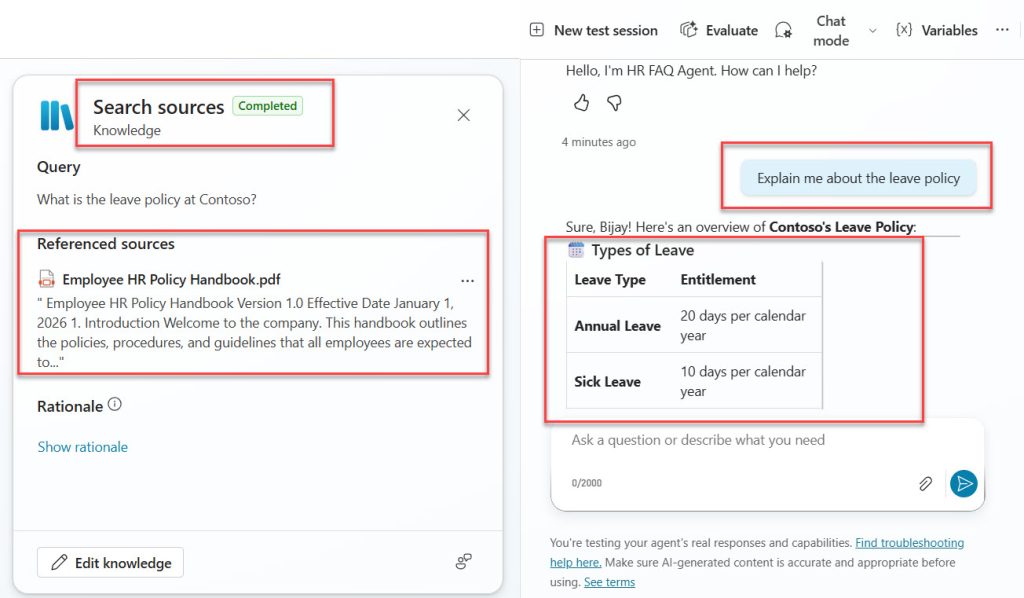
In this example, the user asks:
“Explain me about the leave policy”
The agent searches the connected knowledge source and generates a response based on the information it finds.
You can see the exact response in the screenshot below:
What to Review in the Test Panel
1. Search Sources Activity
- The Search sources activity shows that the agent successfully searched the configured knowledge source.
- The Completed status indicates that the search operation finished successfully.
2. Referenced Sources
- Under Referenced sources, you can see the document that was used to generate the response.
- In this example, the agent retrieved information from:
- Employee HR Policy Handbook.pdf
- The source preview helps you verify exactly where the answer originated.
3. Agent Response
- The response generated by the agent appears in the conversation pane.
- Here, the agent summarizes the leave policy and displays details such as:
- Annual Leave entitlement
- Sick Leave entitlement
4. Validate Response Accuracy
- Compare the generated answer with the referenced document to ensure the information is accurate.
- This helps confirm that the knowledge source is properly indexed and that the agent is retrieving the correct content.
Why This Is Important
Reviewing the Search sources details is one of the most effective ways to troubleshoot and validate your Copilot Studio agent. It allows you to:
- Verify that the correct knowledge source is being used.
- Understand how the agent generated its answer.
- Identify missing or incorrect information in your knowledge base.
- Improve the quality and reliability of responses before publishing the agent to users.
Step 8: Publish the agent to a demo website
Once you are happy with the basic behavior, you can publish the agent so others can try it.
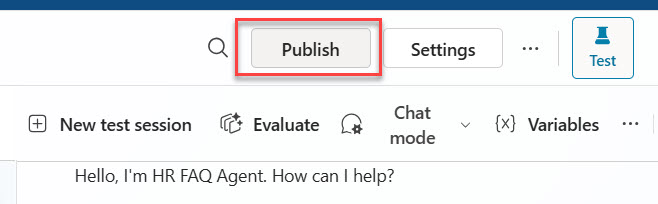
- Publish the Agent
Once you have finished testing your agent, click the Publish button from the top navigation bar like in the screenshot below:
This opens the Publish this agent dialog, where you can make the latest version of your agent available to users.
- Publish the Latest Version
In the Publish this agent dialog:
- Select the Force newest version option.
- Click Publish.
Here is a screenshot for your reference.
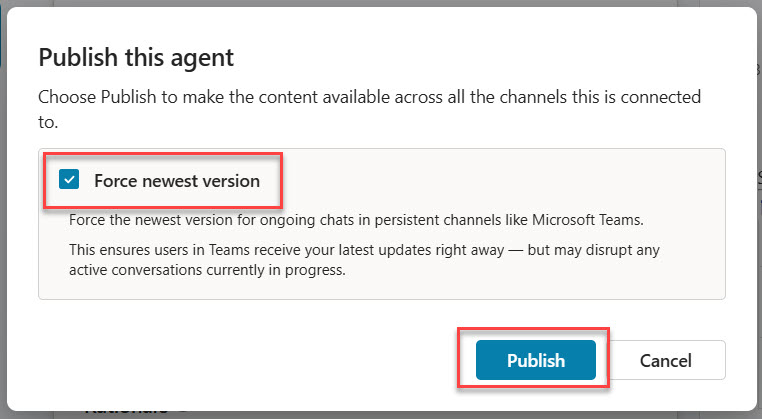
This ensures users receive the most recent version of the agent and any updates you have made.
- Open the Channels Page
After the publishing process completes:
- Navigate to the Channels tab.
- If you see a message indicating that only Microsoft channels are available, your agent is currently using Microsoft authentication.
Here is how it appears:
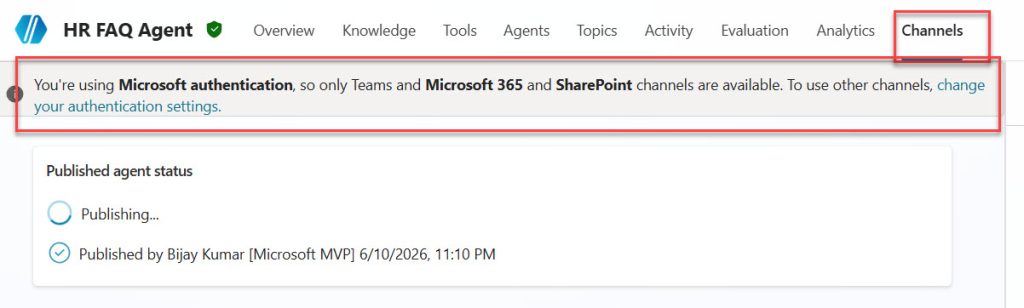
To publish the agent to a public demo website, you need to change the authentication settings.
- Change Authentication Settings
- Click Settings in the top menu.
- Select Security from the left navigation.
- Under Authentication, choose No authentication.
- Click Save.
Here is a screenshot for your reference.

This allows the agent to be shared through public channels, including the Demo Website channel.
- Open the Demo Website Channel
- Return to the Channels page.
- Open the Demo Website channel.
- Configure the following information:
- Welcome message (for example, I am your HR FAQ Agent)
- Conversation starters (optional)
- Click Save.
Here is a screenshot for your reference.
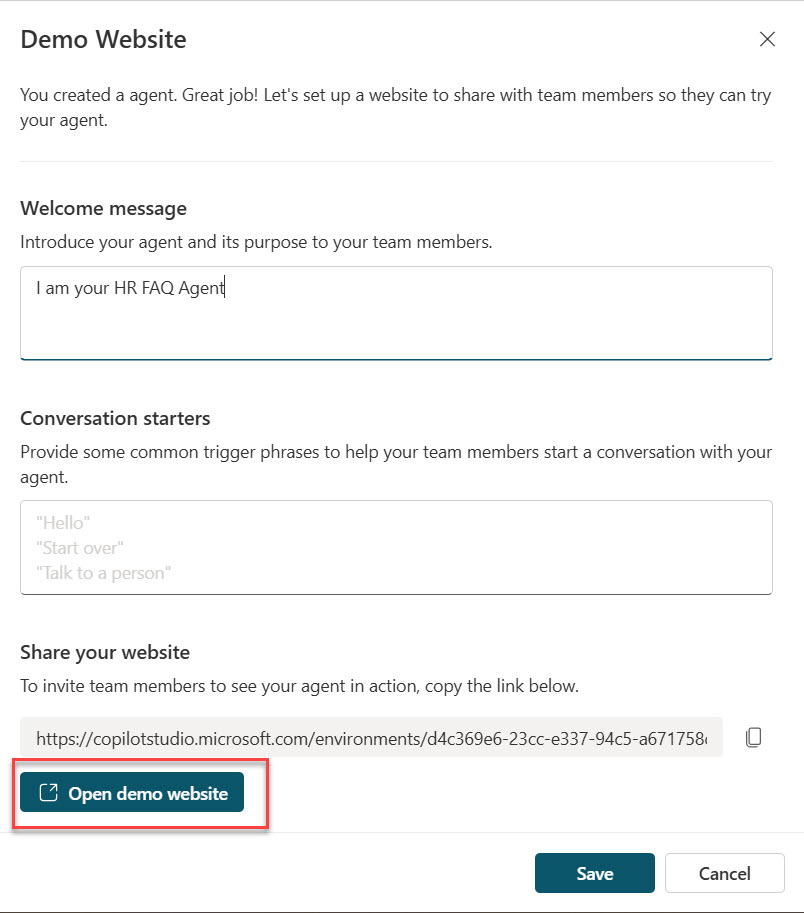
You can also copy the generated website URL if you want to share it directly.
- Launch the Demo Website
Click Open demo website.
The demo website opens in a new browser tab, allowing you to interact with the published agent exactly as an end user would.
At this point, your Copilot Studio agent is successfully published and available through the Demo Website channel for testing and sharing.
Conclusion
Microsoft Copilot Studio makes it easy to build AI-powered agents without extensive coding knowledge. In this tutorial, you learned how to create your first AI agent, add knowledge sources, test its responses, publish it, and make it available through a demo website.
By following these steps, you can quickly build agents that answer questions, automate common tasks, and provide self-service support for employees, customers, or business users. As you become more familiar with Copilot Studio, you can further enhance your agents with topics, actions, Power Automate flows, and integrations with other Microsoft services.
Start with simple use cases, validate the responses using the testing tools, and gradually add more advanced capabilities to create intelligent agents that deliver real business value.

Bijay Kumar is a Microsoft MVP in Business Applications with over 18 years of experience in the IT industry and more than 12 years as a Microsoft MVP, recognized for his contributions to the Microsoft community. He is the Founder of TSinfo Technologies and the creator of the popular technology platforms SPGuides.com and EnjoySharePoint.com. Bijay also runs the SPGuides YouTube channel, where he shares practical tutorials on Microsoft 365, SharePoint, Power Platform, and Copilot technologies. Read more.